So I Googled 'paper crafts' and had a hit for one of my favorite sites for all kinds of things FAMILY--FamilyFun.com.
Years ago we had a magazine subscription to Family Fun Magazine and loved it. I gleaned SO many good and inexpensive ideas for birthday parties and our celebrations of Christmas and Hallowe'en that the price was well worth it at a time when we could hardly afford much of anything. As our family grew older we outgrew the usefulness of having the magazine delivered monthly, but I was delighted to find the correlating website that is free to anyone and is packed with amazing stuff. Some of our all-time favorite family recipes came from Family Fun as well.
At any rate, a couple of years ago our family had an activity in which we made paper-making frames. Just the frames. It wasn't until just today that we finished those frames, adding screening to make them actually usable so we could make paper. The frames are very simple--just four pieces of 1/2 X 1 inch pine held together with screws and wood glue, then the finished frame has been coated with an exterior varnish to protect it from repeated use in water. After that it's just a matter of using an old window screen (or you can buy new window screening at a hardware store) and stapling it on. We used a paper stapler instead of a wood staple gun, as I was concerned that the staple gun would shred the screening. I have an amazing stapler that worked beautifully. It's called a PaperPro. You will never find a better, easier to use, or more powerful hand stapler anywhere. Well worth the price (starting at around $10).
And that's what we did, following the basic paper-making instructions from THIS Family Fun activity.
Instead of using the thick pulp and making the bowls, we thinned the pulp with about double the water and used a large under-bed storage box to use as our paper pulp dispenser.
Here, Maren is tearing the newspaper and colored construction paper (for the color) into little bits--about an inch square. Tear, don't cut. You want to preserve the paper fibers intact as much as possible.

Here, we've put the bits of paper into our blender. We then added about four cups water and let it sit from just a few seconds to let the paper soften nicely.

Then, we blend.

Be careful about blending. This process can be stressful on your blender motor. If you have an 'ice breaker' or pulping mode on your blender, use that to blend in short bursts until the larger pieces of paper are chopped up quite small, then you can let 'er rip, blending as thoroughly as you want. If you blend for a long time (2 or 3 minutes) you'll get a more uniform, smoother paper. If you blend for a short time your paper will have larger bits of different colored paper in it, which can result in some interesting effects. You can also add bits of dried flowers or leaves or herbs to add some interesting effects. We did three batches, using a single whole sheet of newspaper and two sheets of construction paper per batch.
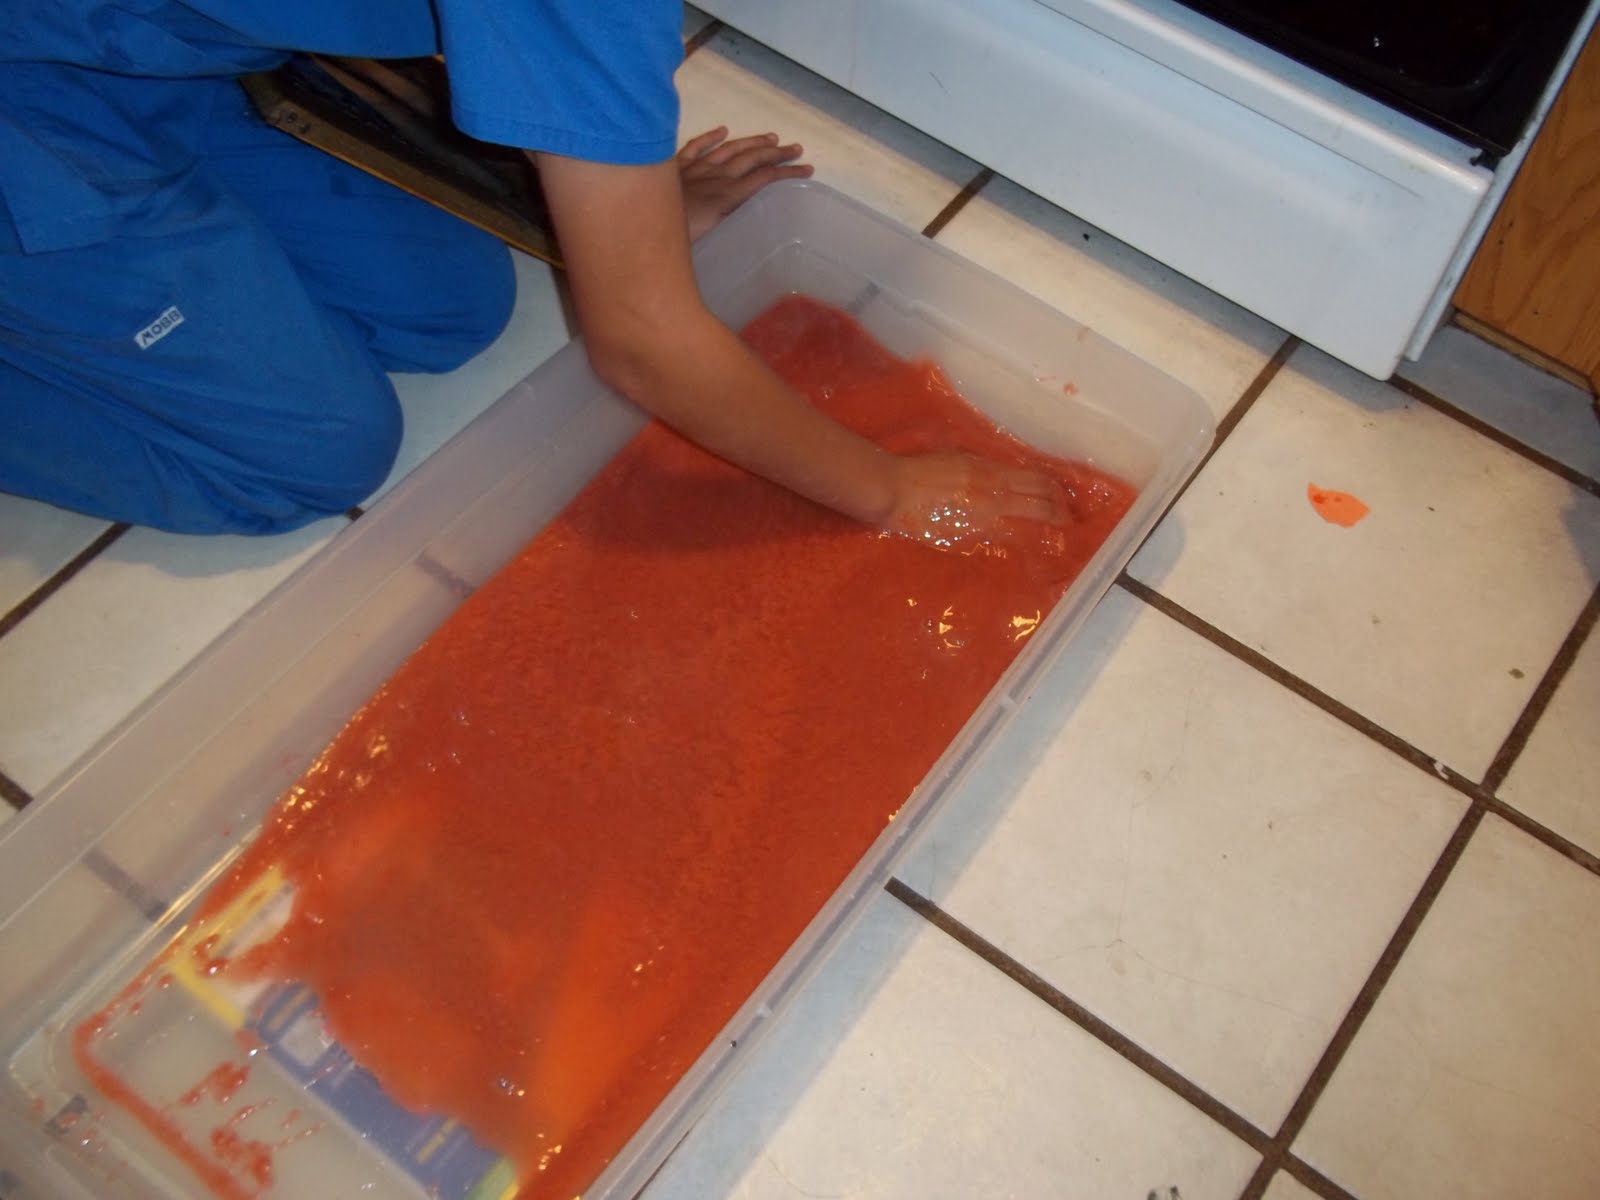
Now that the paper is blended and smooth, pour it into a large container. A large tote should work. We used one of those under-bed storage boxes. Now double the amount of water.

Now we're ready to make paper. Read carefully. The technique is fairly important. There needs to be enough water to be able to completely immerse the frame. We had to tilt that big long tote, using a phone book to hold one end up in order to make the water deep enough. If you plan carefully, you'll build your frames just the right size to fit nicely into the container you want to use. A plastic dishtub works well if your frames are made to fit into it. But our method worked fine.
Using a spoon or just your hand, thoroughly mix the pulp and water so the paper pulp is evenly distributed in the water.
IMMEDIATELY (before the pulp has a chance to settle again) immerse the frame in the mixture, immersing first one end and sliding it under the water, sort of like the frame is a ladle and the pulp mixture is soup.

Slowly draw the frame upward, gently shaking it from side to side as you do so. This causes the pulp fibers to align themselves, making the paper stronger. Commercial paper is made using a similar technique. That's why it's easier to tear a piece of paper into strips in one direction than it is the other.

Stop shaking the frame once the water begins draining nicely. Hold the frame over the water and let it drain out until it has almost stopped dripping.

Now put the frame somewhere flat to dry. We've chosen to suspend them over our kitchen sink. You could also place them on a folded towel or suspend them outside, using rocks at the corners of the frames to keep it up off the ground.

You should have enough pulp in your water to do three or four pieces of lovely, thick paper.
Leave it until it's dry, which could take a long time--hours--and it should just pop out of the frame fairly easily. I'll let you know if ours doesn't, but I'm not waiting for our paper to dry to get this posted. After it's dry, you can pull out your iron and iron it to make it smoother if you want.
Now you can use it for whatever you want--other crafts or drawing or painting. I might save mine for paper sculpture!
No comments:
Post a Comment